Applying a spread to a spreadsheet
Once you have created a spread that defines the departments, plan files, and accounts that require adjustments, you can apply the spread to the budget spreadsheet.
To apply a spread to a spreadsheet
-
Open the Top Down Spreadsheet. The spreadsheet based on your spread definitions open.
-
If you have just completed your spread, click Create Spreadsheet at the bottom of the form.
-
If you are working with a saved spread, follow these steps:
-
From the home page, click the Financial Planning tile.
-
Click the Manage Spreads button. A list of saved spreads is listed.
-
Click the name of the spread you want to use. Your spread opens.
-
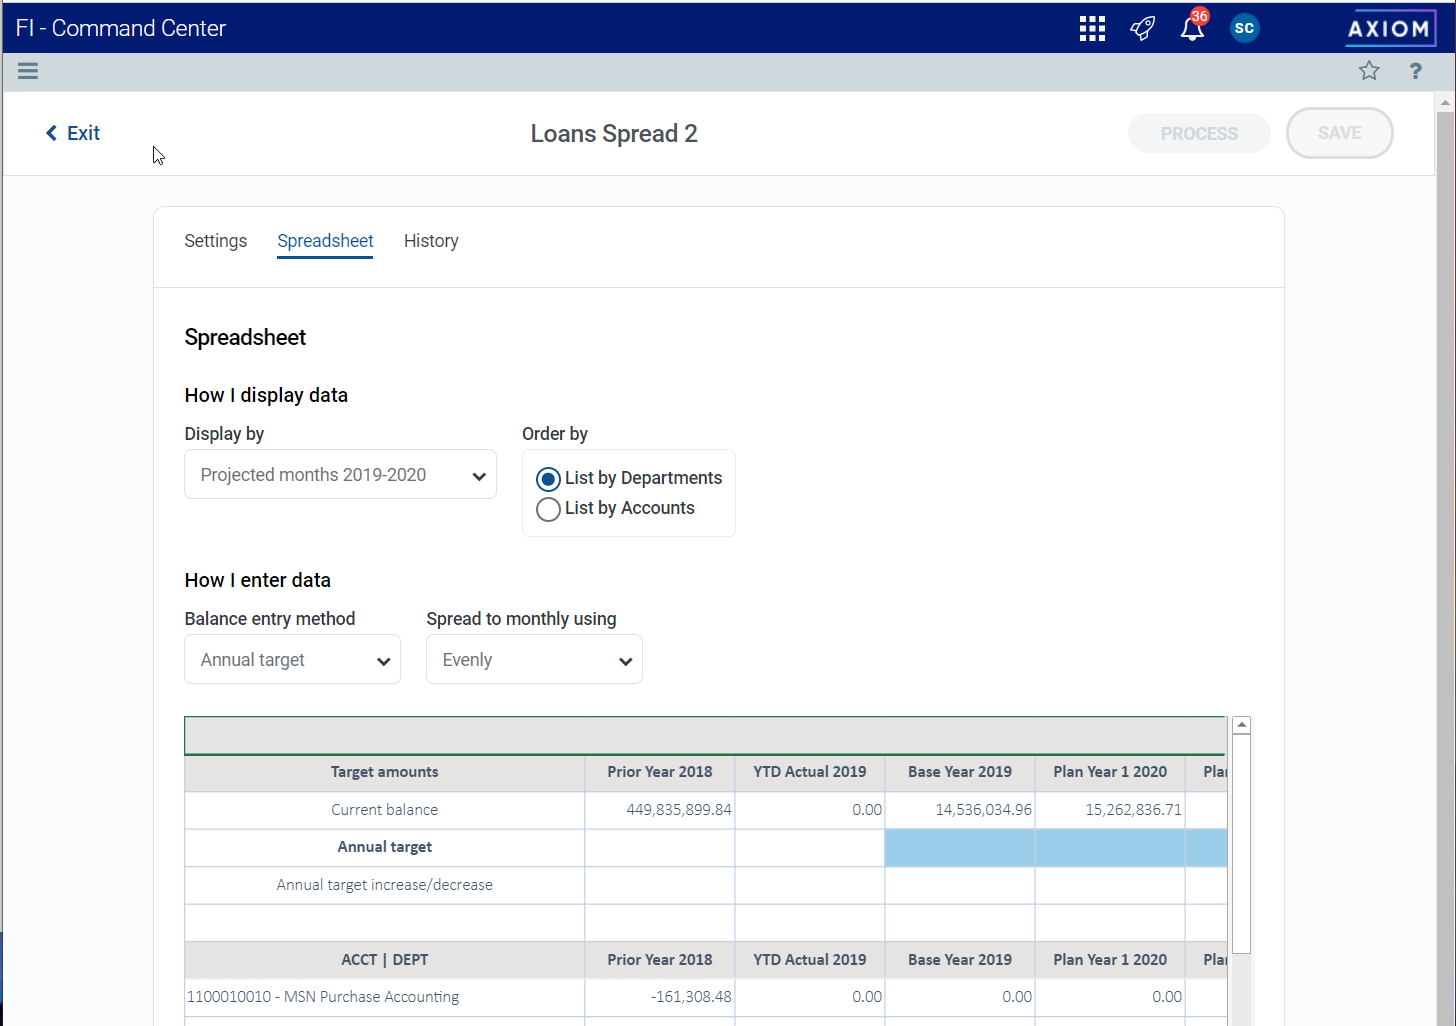
Click Spreadsheet at the top of the page.
-

Click image to view full size
-
-
Use the Display by drop-down menu to select the budgeting dates. Values may include projected months, actual and project months, and other distinctions.
-
Use Order by to select list by departments or by accounts.
-
Use the Balance entry method drop-down to select a method, such as Annual target.
-
Use the Spread to monthly use drop-down to select how the adjustment will be spread, such as Evenly.
-
Enter your adjustments in the spreadsheet, Use the cells shaded blue to enter your adjustment amounts

Click image to view full size
-
Click Process. Your adjustments are spread to the accounts you chose, using the methods you chose.

NOTE: Once processed, the spread cannot be deleted.
IMPORTANT: Budget plan files must be processed once a spread has been applied. See Processing budget plan files for more information.
Additional information
